
How to Build a DIY Pallet Swing Bed (Complete Step-by-Step Guide)
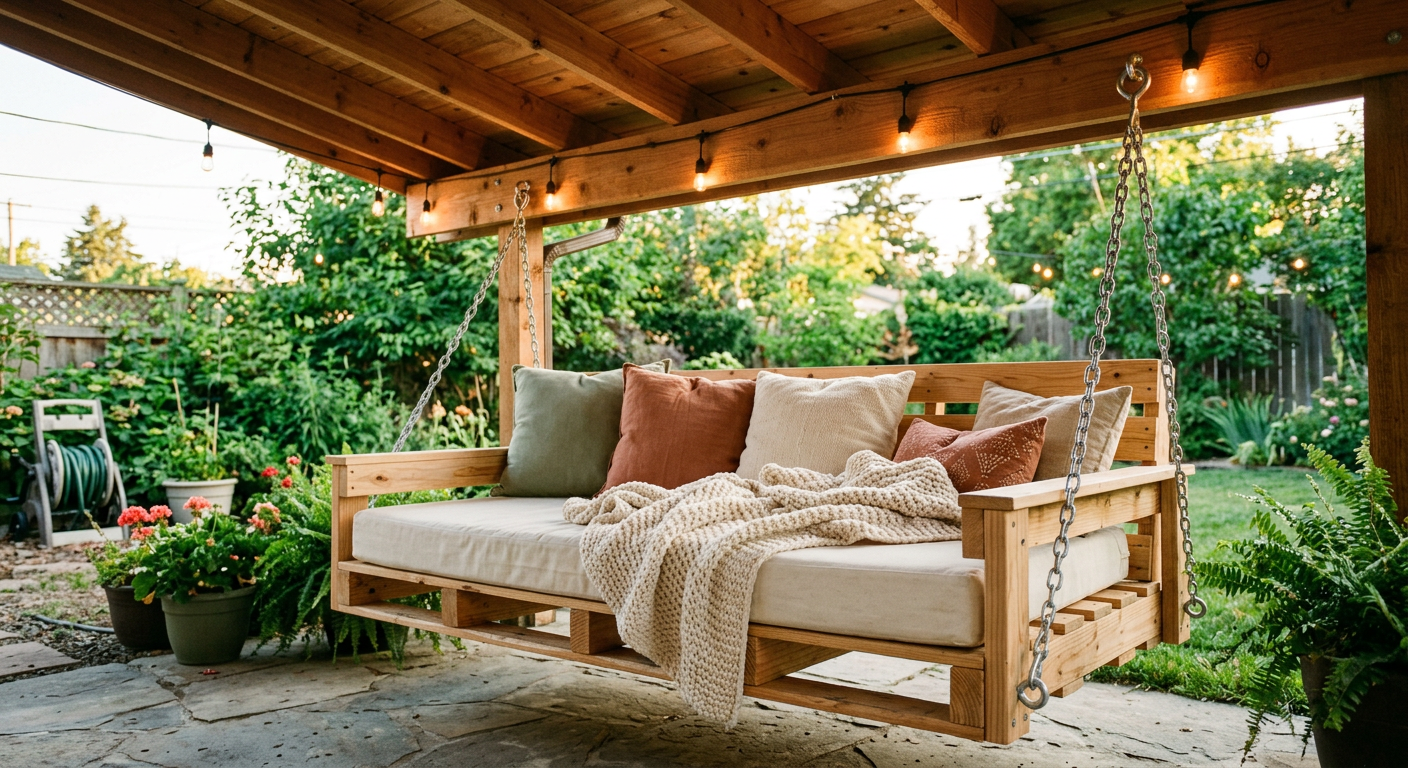
Turn a few inexpensive pallets into the most relaxing seat in your backyard — a step-by-step guide from choosing safe pallets to hanging the finished bed.
Disclosure: This post may contain affiliate links. If you purchase through one of these links, ProjectPerfectDIY may earn a small commission at no additional cost to you. We only recommend products we'd actually use ourselves.
How to Build a DIY Pallet Swing Bed (The Complete Step-by-Step Guide)
Turn a few inexpensive pallets into the most relaxing seat in your backyard.
Imagine Ending Every Day Here…
There are backyard projects that look nice… and then there are projects that completely change how you use your outdoor space.
A pallet swing bed falls into that second category.
There's something about gently swaying under the shade of a tree with a good book, your morning coffee, or an afternoon nap that instantly makes your backyard feel like a vacation. The best part? You don't need to spend thousands of dollars on a luxury hanging daybed to get that experience.
With a few quality pallets, some basic tools, and a weekend of work, you can build a beautiful swing bed that's sturdy, comfortable, and completely customizable to your style.
Whether you're going for rustic farmhouse charm, modern minimalist, or cozy cottage vibes, this project can be adapted to fit almost any outdoor space.
When I first came across these on Pinterest, I assumed they were expensive custom builds. Then I realized many of them were built almost entirely from reclaimed pallets. That changed everything. Instead of being an "I'll build that someday" project, it became something that was actually realistic.
In this guide, I'll walk you through everything—from choosing safe pallets to hanging the finished bed securely—so you can build one with confidence.
Why Build a Pallet Swing Bed?
Besides looking incredible, pallet swing beds have a lot going for them.
They're surprisingly affordable.
Outdoor hanging beds can easily cost anywhere from $1,000 to over $4,000 depending on the materials and brand. Building your own often costs a fraction of that, especially if you're able to source quality pallets for free.
They're beginner friendly.
If you've built a shelf, picnic table, or simple workbench before, this project is absolutely within reach. Most of the work involves:
- Measuring
- Screwing boards together
- Sanding
- Painting or staining
- Installing heavy-duty hardware
Nothing requires advanced woodworking skills.
They're completely customizable.
Want it painted white like a coastal beach house? Go for it. Prefer a dark walnut stain? Easy. Want it large enough for two adults and three kids? Build it bigger. You control every detail.
They become the centerpiece of your backyard.
One of the reasons these projects are so popular on Pinterest is because they instantly make an outdoor space feel finished. Add a few pillows, string lights, and some hanging plants, and suddenly your patio becomes everyone's favorite place to sit.
Before You Start
Although this project is beginner friendly, it's important to remember that this isn't just outdoor furniture—it's suspended furniture. That means strength and safety come first.
We'll spend extra time reinforcing the frame and choosing hardware that's properly rated for the weight it will carry. It's tempting to save a few dollars on chains or eye bolts. Don't. The few extra dollars spent on quality hardware is the cheapest insurance you'll ever buy.
How Much Does It Cost?
One of the biggest questions people ask is whether building one is actually cheaper than buying one.
| Item | Estimated Cost |
|---|---|
| Free or reclaimed pallets | $0–40 |
| Deck screws | $15 |
| Structural screws | $20 |
| Heavy-duty eye bolts | $25 |
| Chain or marine rope | $40–120 |
| Sandpaper | $12 |
| Exterior stain or paint | $30–60 |
| Outdoor sealer | $25 |
| Mattress or cushion | $75–250 |
Budget Build: ~$175 Mid-Range Build: ~$300 Premium Version: ~$500–700
Still dramatically less than buying a comparable hanging daybed.
Choosing Safe Pallets (This Part Matters)
Not every pallet is safe to build furniture from. Some pallets have been used to transport food. Others have carried industrial chemicals. Some are treated using methods you absolutely don't want inside your home—or underneath the mattress where your family will be relaxing.
Fortunately, identifying safe pallets is easy once you know what to look for.
Look for the HT Stamp
The safest pallets are marked HT — Heat Treated. These pallets are sanitized using high temperatures instead of chemical fumigation. They're generally considered the best option for DIY furniture.
Avoid MB
If you see MB, walk away. MB stands for Methyl Bromide, a chemical fumigant that isn't appropriate for furniture projects. No matter how nice the pallet looks, skip it.
Avoid Pallets That Show Signs Of:
- Oil stains
- Chemical spills
- Mold
- Rot
- Strong odors
- Excessive splitting
- Severe water damage
If something seems questionable, trust your instincts. There are plenty of other pallets available.
Where Can You Find Free Pallets?
One of the biggest misconceptions is that pallets are hard to find. They're actually everywhere. Some of the best places include:
- Local hardware stores
- Feed stores
- Garden centers
- Appliance stores
- Flooring companies
- Furniture stores
- Construction sites (always ask first)
- Facebook Marketplace
- Craigslist
- Local community groups
A quick phone call can often save you hours of searching. Many businesses are happy to have someone haul pallets away for free.
Planning Your Swing Bed
Before cutting anything, decide how large you want your finished swing. The size determines how many pallets you'll need, how much hardware you'll buy, the size of your mattress, and the weight capacity you'll need to support.
| Mattress Size | Great For |
|---|---|
| Twin | One adult |
| Full | Two adults |
| Queen | Two adults with extra room |
If you have the space, a queen-size swing bed quickly becomes everyone's favorite place to relax. Just remember that a larger bed also means more weight, so your support structure and hanging hardware need to be sized accordingly.
Tools You'll Need
Measuring & Layout: Tape measure, carpenter's square, pencil, chalk line (optional)
Cutting & Assembly: Circular saw, drill/driver, impact driver (helpful but optional), clamps, socket wrench set
Surface Preparation: Orbital sander, sandpaper (60, 120, and 220 grit)
Safety Gear: Safety glasses, hearing protection, dust mask or respirator, work gloves
A Quick Word About Hardware
If there's one place you shouldn't cut corners, it's here. Your finished swing bed could easily support 500–1,000 pounds once you account for the frame, mattress, and the people using it.
Every single component—from the eye bolts to the chain, rope, washers, and lag screws—should be rated well above the maximum weight you expect the swing to carry. When in doubt, buy the stronger option.
Step 1: Preparing the Pallets
 Now that you've gathered your materials, it's time to get those pallets ready. This might not be the most exciting part of the project, but don't rush it. The time you spend preparing the wood now will have a huge impact on how the finished swing bed looks and how long it lasts.
Inspect Every Pallet
Lay each pallet on a flat surface and check for:
- Loose boards
- Cracked or split wood
- Warped sections
- Rot or soft spots
- Missing boards
- Protruding nails or staples
Pro Tip: Pick up an extra pallet or two. Having spare boards on hand makes it easy to replace damaged pieces and gives you extra material for reinforcing the frame later.
Remove Old Nails and Staples
Use a pry bar, hammer, or nail puller to remove any exposed fasteners. If a nail won't budge without damaging the wood, drive it completely below the surface with a nail set rather than leaving it sticking out.
Replace Damaged Boards
If you find a board that's badly cracked or warped, remove it and replace it with a board from one of your spare pallets.
Clean the Wood
Sweep away loose dirt and dust with a stiff brush. If they're particularly dirty, wash them using mild dish soap and water. Allow the pallets to dry completely before moving on—if you stain or seal damp wood, you'll trap moisture inside.
Decide on Your Layout
Before driving a single screw, arrange your pallets on the ground exactly how they'll sit in the finished swing bed. Ask yourself:
- Do the best-looking boards face upward?
- Are the pallet seams lined up evenly?
- Does everything look square?
- Is there enough room for the mattress you plan to use?
Reinforce Weak Areas
- Adding extra 2×4 cross braces underneath
- Installing additional screws where boards feel loose
- Replacing thin or cracked deck boards
- Adding corner blocking for extra rigidity
Measure Twice, Cut Once
Carefully measure the dimensions of your mattress and compare them with your pallet layout. Use a carpenter's square to ensure your cut lines are perfectly straight before reaching for the saw.
Step 2: Building the Swing Bed Frame
 While pallet furniture is known for being simple to build, a hanging bed experiences a lot more movement and stress than standard furniture. Every screw, brace, and connection plays an important role in keeping the bed rigid and safe.
Decide on Your Finished Size
| Mattress Size | Approximate Platform Size |
|---|---|
| Twin | 42" × 80" |
| Full | 58" × 80" |
| Queen | 64" × 84" |
Join the Pallets Together
Use 3-inch exterior structural screws rather than standard drywall screws. Drive screws through the side stringers where the pallets meet, spacing screws approximately every 8 to 10 inches along each joint.
Add Cross Bracing
Using pressure-treated 2×4 lumber, cut braces to fit across the underside of the bed. Position them evenly from front to back and secure each brace with structural screws driven into every pallet it crosses.
Pro Tip: If you're planning for multiple adults to use the swing at the same time, don't stop at two braces. Adding three or four cross braces adds very little cost but dramatically improves rigidity.
Reinforce the Perimeter
Run additional 2×4 lumber around the inside edges of the frame, fastening it securely with structural screws. This creates a box-like structure that's considerably stronger than pallets alone and provides a solid location for mounting hanging hardware later.
Install Corner Blocking
Cut four small pieces of 2×4 and install one inside each corner. These blocks act like braces, preventing the frame from racking or shifting over time.
Verify Everything Is Square
Measure diagonally from one corner of the frame to the opposite corner, then measure the other diagonal. If both measurements match, your frame is square.
Test the Platform
Carefully climb onto the platform, sit near the edges, and shift your weight. Minor wood creaks are completely normal. What you don't want to hear are loud pops, significant flexing, or screws pulling loose.
Step 3: Sanding & Finishing the Wood
If there's one step that separates a pallet project from looking homemade versus professionally built, it's the finishing work.
Round Over the Sharp Edges
Lightly round over every exposed corner with your sander. Pay extra attention to the front edge, side edges, corners, armrests, and areas where feet and legs are likely to rest.
Sand in Three Stages
- 60 Grit: Remove rough texture, weathered wood, splinters, and minor imperfections.
- 120 Grit: Removes deep scratches left behind by coarse paper while smoothing the surface.
- 220 Grit: Creates a smooth, furniture-quality surface comfortable enough for bare hands and feet.
Pro Tip: Let the sander do the work. Pressing harder doesn't make sanding faster—it creates uneven surfaces and wears out sandpaper more quickly.
Fill Small Gaps and Imperfections
Use an exterior-rated wood filler to repair deep gouges, large nail holes, minor cracks, chips, and small voids. After the filler dries, sand those areas smooth.
Remove Every Bit of Dust
Vacuum every surface, then wipe everything down with a slightly damp microfiber cloth or tack cloth.
Choosing Your Finish
Natural Wood Stain — Cedar, Golden Oak, Provincial, Walnut, Espresso, Weathered Gray.
Exterior Paint — Crisp White, Sage Green, Matte Black, Navy Blue, Charcoal Gray, Soft Beige.
Should You Seal It?
Absolutely. Apply two to three thin coats of a quality exterior sealer, allowing each coat to dry completely before adding the next. A quality exterior sealer helps protect against UV damage, moisture, mold and mildew, fading, cracking, and peeling.
Step 4: Installing the Hanging Hardware
 This is the part of the project where we slow down and get very serious.
Choose Heavy-Duty Hardware
For a hanging bed, every piece of hardware needs to be rated for the load it will carry: eye bolts, lag bolts, swing hangers, washers, lock nuts, chain, rope, carabiners, quick links.
Chain vs. Rope
| Option | Best For | Notes |
|---|---|---|
| Galvanized chain | Strength and durability | Great for heavy swings and exposed outdoor use |
| Marine-grade rope | Softer, coastal, rustic look | Must be rated for load and checked regularly |
| Porch swing hanging kit | Easy installation | Convenient option if properly rated |
| Stainless steel hardware | Coastal or wet climates | Best for year-round outdoor use |
Install Hardware Into Reinforced Points
Do not attach eye bolts directly into thin pallet boards. Attach your hanging hardware through the reinforced 2x4 perimeter frame or through added blocking underneath the bed. For most rectangular swing beds, you will use four hanging points: front left, front right, back left, back right.
Predrill Your Holes
Use a drill bit slightly smaller than the shaft of the bolt. Install each eye bolt with a washer and lock nut where applicable, then tighten everything securely with a socket wrench.
Building a Freestanding Support Frame
For a basic freestanding frame, you will typically need:
- Two vertical side posts
- One strong top beam
- Angled braces
- Concrete footings or buried post supports
- Heavy-duty swing hangers
Use pressure-treated lumber for any structure exposed to weather.
Attaching to a Porch Ceiling
Attach the hardware into structural beams or joists, not just ceiling boards or trim. If you are unsure whether the porch can safely hold the swing, ask a qualified contractor or builder to inspect it before installing anything.
Hanging From a Tree
A large, healthy tree can work, but only if the branch is strong enough and in good condition. Use tree-friendly straps instead of wrapping chain directly around the branch.
Level the Swing
Use a level to check the swing from front to back and side to side. Adjust chain links or rope lengths until the platform sits evenly.
Perform a Controlled Weight Test
Start by applying gentle downward pressure, then add weight slowly using sandbags, bags of concrete, or water jugs. Watch for hardware movement, wood cracking, chain twisting, rope stretching, frame shifting, or any unusual sound.
Step 5: Add the Mattress & Make It Comfortable
Congratulations—you've officially made it through the hardest part of the project.
Choosing the Right Mattress
You don't necessarily need a custom outdoor mattress. Many DIYers successfully use standard mattress sizes paired with a waterproof cover.
Outdoor Foam Cushions
If your swing will stay outside year-round, outdoor foam cushions are one of the best investments you can make. Outdoor foam is designed to dry quickly, resist mildew, handle moisture, maintain its shape, and withstand sun exposure.
Can You Use a Regular Mattress?
Yes—but bring it indoors during storms, use a waterproof mattress protector, keep it covered when not in use, and allow it to dry completely if it gets damp.
Layer on the Comfort
- Oversized outdoor throw pillows
- Lumbar support pillows
- Folded blankets for cooler evenings
- Decorative cushions in seasonal colors
- A soft outdoor quilt
- Accent bolsters
Add Functional Accessories
- A small side table for drinks or books
- A weatherproof storage basket for blankets
- Solar lanterns
- Outdoor candles (battery-operated are safer)
- A nearby planter filled with flowers or herbs
- An outdoor rug to define the seating area
Create Shade
A pergola, shade sail, large patio umbrella, retractable canopy, outdoor curtains, or climbing vines on a nearby trellis.
Keep Bugs in Mind
Citronella candles, solar bug zappers, outdoor fans (mosquitoes are weak fliers), hanging mosquito net curtains, lavender or citronella plants nearby.
Step 6: Styling Your Swing Bed
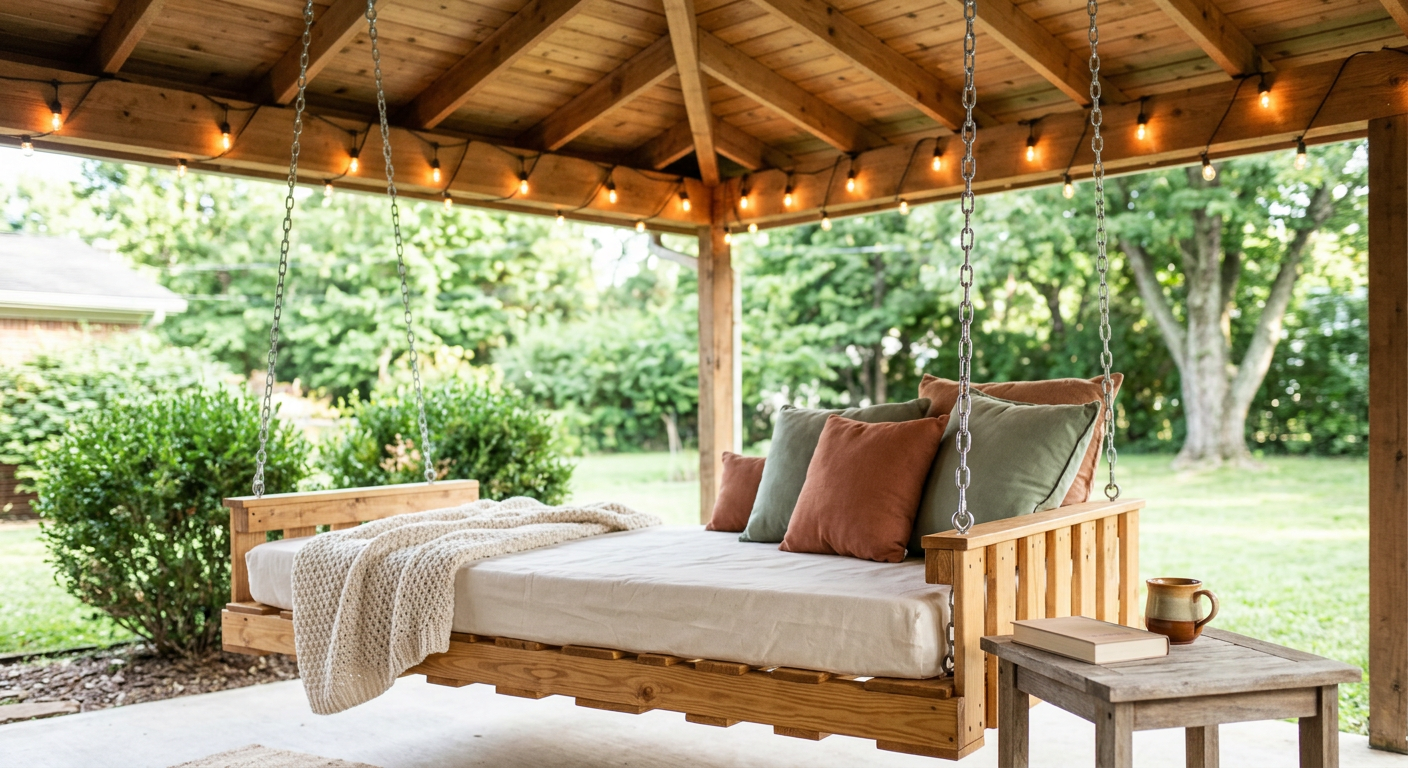
1. Start with a Simple Color Palette
| Style | Colors |
|---|---|
| Coastal | White, beige, soft blue |
| Farmhouse | White, black, tan |
| Boho | Cream, rust, olive |
| Modern | Charcoal, white, gray |
| Garden Cottage | Sage, cream, floral accents |
2. Add Outdoor Throw Pillows
Use a mix of large square pillows, lumbar pillows, round pillows, and a few patterned accent pillows.
3. Use a Cozy Outdoor Blanket
A folded blanket at the end of the swing instantly makes it feel more inviting.
4. Add Solar String Lights
Hang them across the support frame, around a pergola, between nearby trees, along a fence, or behind the swing as a backdrop.
5. Define the Area with an Outdoor Rug
Choose a rug that is weather-resistant, easy to hose off, large enough to extend beyond the swing, and neutral enough to work with seasonal décor changes.
6. Add a Small Side Table
Small wood table, metal garden stool, wicker side table, concrete-style accent table, or repurposed crate or stump.
7. Bring in Plants
Hanging baskets, large potted plants, ferns, lavender, herbs, climbing vines, tall grasses.
8. Add Lanterns
Solar lanterns, battery-operated candles, metal lanterns, rattan lanterns, hanging lanterns.
9. Consider Outdoor Curtains
White or beige curtains create a breezy resort look. Darker curtains feel more dramatic and modern.
10. Add a Mosquito Net
Especially useful for garden swing beds, tree-hung beds, porch beds, and tropical or humid climates.
11. Style It Seasonally
- Spring: Floral pillows, light blankets, fresh plants
- Summer: Bright cushions, solar lanterns, coastal colors
- Fall: Plaid throws, rust or mustard pillows, pumpkins nearby
- Winter: Chunky blankets, evergreen garland, warm white lights
12. Keep It Practical
The best setup usually includes one mattress or cushion, 3–6 pillows, one throw blanket, one nearby table, lighting, and a few plants.
Tools & Supplies I Recommend
{{product:b41d5962-3363-4f4d-891c-ba115a70f936|Top Pick}}
{{product:63ee3c9a-ed22-4249-a031-8bc6e0d57ce1|Budget Pick}}
Final Thoughts
And that's it — your DIY pallet swing bed is officially ready for its backyard debut.
What started as a few rough pallets is now a cozy outdoor spot for morning coffee, lazy afternoons, late-night talks, or pretending you're "just resting your eyes" when you are absolutely taking a nap.
The best part about this project is that it doesn't need to be perfect to be beautiful. Just remember the important parts:
- Use safe, heat-treated pallets.
- Reinforce the frame well.
- Choose properly rated hanging hardware.
- Sand everything smooth.
- Protect the wood with outdoor finish.
- Test the swing before regular use.
Bonus: Round Hanging Daybed Option
If you love the look of those big round hanging beds, the round version is a more advanced build. Instead of using full rectangular pallets as the main platform, a round hanging daybed usually requires a circular plywood base, curved or segmented frame supports, extra reinforcement underneath, a custom round cushion or mattress, multiple balanced hanging points, and more precise measuring and cutting.
If you are new to DIY building, start with the standard pallet swing bed first.
Frequently Asked Questions
How many pallets do I need for a swing bed? Most builds use 2–4 pallets, depending on the mattress size and pallet dimensions.
Can I use any pallet? No. Use pallets marked HT (heat-treated). Avoid pallets marked MB, heavily stained pallets, moldy pallets, or anything with chemical smells.
Can I hang a pallet swing bed from a tree? Yes, but only from a large, healthy branch. Use tree straps instead of wrapping chain directly around the branch.
Is rope or chain better? Chain is usually stronger and lower-maintenance. Marine-grade rope looks softer and more decorative but needs regular inspection.
Can I use a regular mattress outside? Yes, but protect it with a waterproof mattress cover and bring it inside during bad weather.